Would you like to browse our deck tile products and accessories?
On-Site Cleaning, Maintenance & Storage
Designer Deck is pleased to offer our customers professional on-site cleaning and maintenance services, available March-September (or weather permitting). If you should also require your flooring to be removed, relocated and stored, our warehouse is equipped with secure storage facilities that are accessible annually. Please be aware that these services are limited to Designer Deck products only and the origin of initial installation. The following services outline the scope of what’s included:
Full Service Cleaning Packages
- Washing and scrubbing of the product surface (limited too plastic, WPC & Porsets lines/collections only)
- Detailed vacuuming of the deck tile and foundation
- Removal of debris caught between slats of the tile product
- Power Washing available upon request (Pending proper drainage and/or approval from a board or other authority)
- Additional labour (removal of heavy items for the purpose of cleaning your product)
Maintenance
- Thermory hardwood- application/oiling
- Removal and installation services (should your tiles need to be temporarily taken up due to renovations)
- Tile Storage (based on available warehouse space)
- Re-fitting/cutting of tile product
- Re-levelling of tile product
- Repairs of defective product (please refer to warranty for further details)
Storage
- Your tiles are stored in our warehouse facilities securely
- Accessible upon arranging an appointment
- Upfront packages and month by month pricing available upon request
Inquire for Quotes & Appointments
Prices are quoted according to square footage for cleaning (including oiling of hardwood). Set costs apply to maintenance, removal and storage, additional fees may be applicable. If you would like more information including specific fees for our cleaning, maintenance and/or storage options, please contact us @ 905.266.2611 or kindly fill out the form below and one of our staff members will be happy to get back to you with further details.
Customer Care
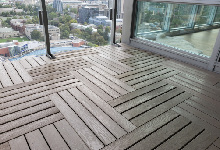
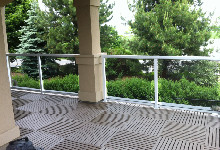
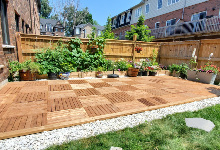
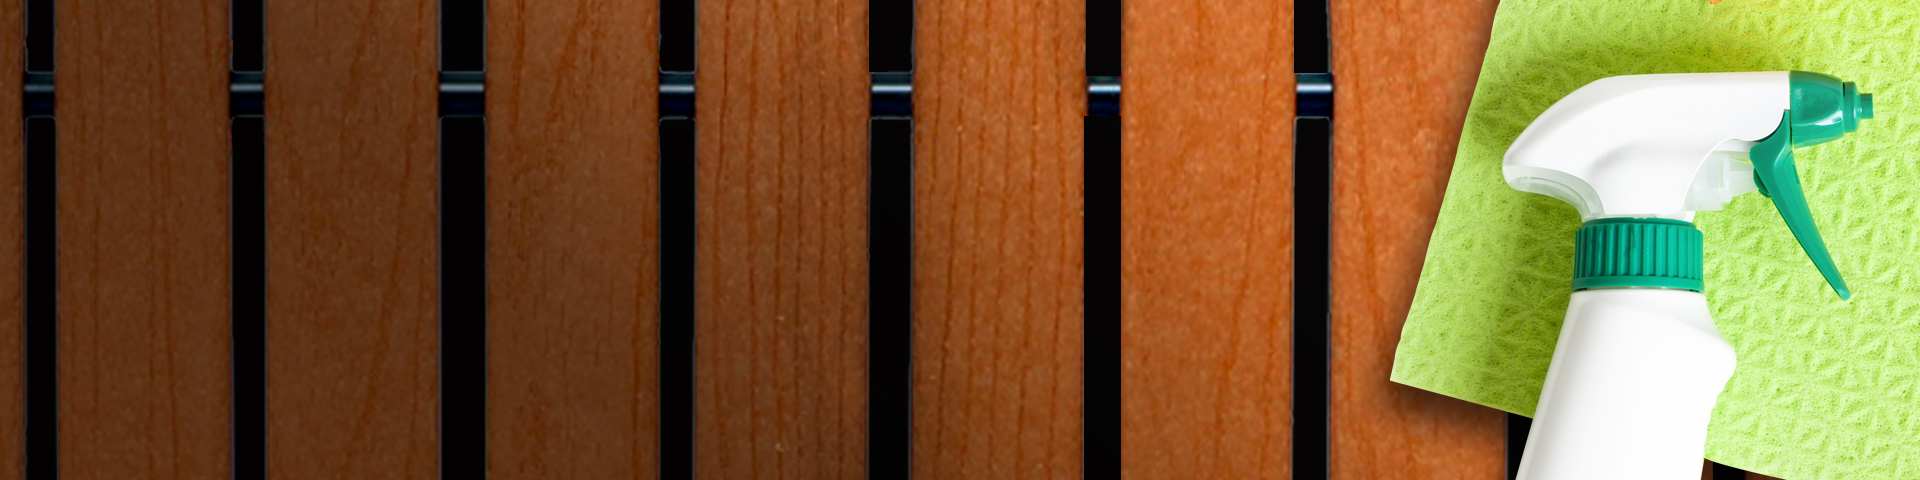
Designer Deck’s deck tile products are durable and designed to withstand the outdoors year-round. Nevertheless, they still require some minimal and easy care. We highly recommend cleaning your deck tiles once too twice a year to improve longevity, cleanliness, aesthetics but more importantly, efficient water/air flow. Whether you choose to tackle this task yourself or take advantage of our onsite cleaning service, it’s important to be aware that lack of maintenance may lead to issues that could void warranty on your purchase. As such, the following procedures should be taken with each product line/collection to ensure optimal performance and care of the material:
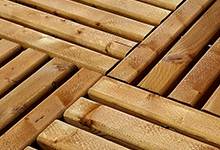
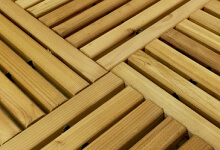
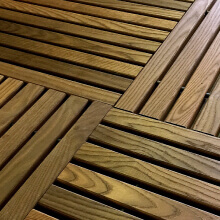
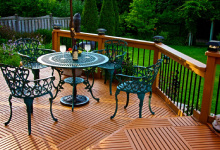
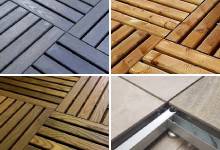
Natural Wood
Applicable too Cottage Plank, Rustic & Thermory lines
Maintenance Steps
- Remove any loose debris/dust/dirt from the surface and gaps of your deck tile by vacuuming or sweeping it up with a soft bristle brush. Any stubborn debris caught in between the slats can be dislodged using something thin such as a chisel, screwdriver or spatula.
- Optional step: we highly recommend removing each tile one by one (only) to expose and clean any debris accumulation underneath the tile. This will ensure optimal drainage and airflow performance of your flooring. When taking this step, it is extremely important that the levelling strips positioned underneath your tiles are put back exactly as they were installed.
- Repeat steps 1-2 as required.
- Applicable to Thermoryhardwood tiles only: Oiling the surface of this tile is not required, but recommended if you wish to showcase a deep, rich and luxurious appearance to your wood product year-round. Any oil of your choice will do the job. This can be done as often as you wish, but should not need to be applied any more than once or twice a year at the most. Refer to the oiling instructions and apply the liquid moving with the grain of the boards. You may achieve maximum, uniform coverage by wedging the applicator (saturated with oil) between the slats and as you move along the boards with smooth strokes.
Tips
- Build up of organic matter underneath a deck tile, may lead to issues with fungus, mould or mildew growth, as it gets trapped and retains moisture. This could further void the warranty that comes with your purchase, if damage occurs to the tile as a result of leaving organic build-up for long periods of time. Make sure you clean your deck tiles according to the exposure of the elements and how frequently you see fit.
- Tiles should be cleaned individually instead of removing them all. This ensures the levelling material that is originally installed, is left intact and does not shift dramatically. Vacuum the surface and the tile itself taking care not to shift these out of place.
- Power Washing – This is not necessary but should be considered in the event that your area is situated on ground level and/or exposed to damp/dusty conditions that collect elements such as fungus, mildew, mould or dirt. Although the pressure treated and thermory deck tiles are covered against this, you may experience issues with water drainage and airflow if unattended too and left to accumulate on the surface or beneath. It will also assist with stubborn dirt/dust that accumulates and is otherwise impossible to remove off of a wood material surface over time.
Applicable to Thermory hardwood tiles only: the beauty of this product also lies in its natural aging process. Thermories are designed to oxidize and turn a weathered grey colour, while retaining durability and structural integrity, compared to conventional hardwoods. This is due to the propriety science behind the make-up of this material. You may choose to omit the oiling process based on personal preference. It is merely an aesthetic choice that will not affect the tile or interfere with your warranty protection.
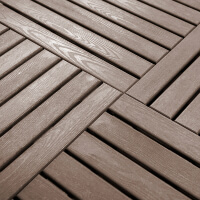
Recycled Plastic
Applicable too Vivid & Contour collections
Maintenance Steps
- Remove any loose debris/dust/dirt from the surface and gaps of your deck tile by vacuuming or sweeping it up with a soft bristle brush. Any stubborn debris caught in between the slats can be dislodged using something thin such as a chisel, screwdriver or spatula.
- Optional step: we highly recommend removing each tile one by one (only) to expose and clean any debris accumulation underneath the tile. This will ensure optimal drainage and airflow performance of your flooring. When taking this step, it is extremely important that the levelling strips positioned underneath your tiles are put back exactly as they were installed.
- Proceed to wash and scrub the surface material of your tiling by moving with the grain. Any (non aggressive) all-purpose cleaner, such as dish soap liquid mixed with water to create a soapy solution, is highly recommended
- The soapy solution can then be mopped up as needed with fresh water. Repeat steps 1-3 as required.
Tips
- Build up of organic matter underneath a deck tile, may lead to issues with fungus, mould or mildew growth, as it gets trapped and retains moisture. This could further void the warranty that comes with your purchase, if damage occurs to the tile as a result of leaving organic build-up for long periods of time. Make sure you clean your deck tiles according to the exposure of the elements and how frequently you see fit.
- Tiles should be cleaned individually instead of removing them all. This ensures the levelling material that is originally installed, is left intact and does not shift dramatically. Vacuum the surface and the tile itself taking care not to shift these out of place.
- For stubborn stains such as grease or oil drippings from a BBQ or food, we recommend any degreaser product suitable for use on decks.
- Tiles should be cleaned individually instead of removing them all if you should choose to access the foundation for maintenance. This ensures the levelling material is left intact and does not shift dramatically. Vacuum the surface and the tile itself on regular basis to eliminate large amounts of debris working their way underneath your flooring.
- Power Washing – This is not necessary but should be considered in the event that your area is situated on ground level. It will also assist with stubborn dirt/dust that accumulates over time and may become difficult to remove from the embossed grain by only scrubbing the surface with a soapy solution.
- In order to remove ice or snow accumulation, we recommend using calcium chloride or rock salt. When applying these products to your flooring, they may leave a white residue. This can easily be removed with a soft brush and warm soapy water.
- It is recommended to keep heat sources away from plastics, as they have a tendency to retain them. This can also lead to damage in the deck tile surface.
WPC (Wood Plastic Composite)
Applicable too Opulent collection
Maintenance Steps
- Remove any loose debris/dust/dirt from the surface and gaps of your deck tile by vacuuming or sweeping it up with a soft bristle brush. Any stubborn debris caught in between the slats can be dislodged using something thin such as a chisel, screwdriver or spatula.
- Optional step: we highly recommend removing each tile one by one (only) to expose and clean any debris accumulation underneath the tile. This will ensure optimal drainage and airflow performance of your flooring. When taking this step, it is extremely important that the levelling strips positioned underneath your tiles are put back exactly as they were installed.
- Proceed to wash and scrub the surface material of your tiling by moving with the grain. Any (non aggressive) all-purpose cleaner, such as dish soap liquid mixed with water to create a soapy solution, is highly recommended
- The soapy solution can then be mopped up as needed with fresh water. Repeat steps 1-3 as required.
Tips
- Build up of organic matter underneath a deck tile, may lead to issues with fungus, mould or mildew growth, as it gets trapped and retains moisture. This could further void the warranty that comes with your purchase, if damage occurs to the tile as a result of leaving organic build-up for long periods of time. Make sure you clean your deck tiles according to the exposure of the elements and how frequently you see fit.
- If organic matter such as leaves or planting soil gets stuck in between the gaps of your deck tiles and you find water collecting; tannins may begin to form. Therefore, it is best to use a hose, spatula or soft broom to remove debris from the gaps. Keeping these gaps clean will reduce the chance of these tannins forming.
- Tiles should be cleaned individually instead of removing them all. This ensures the levelling material that is originally installed, is left intact and does not shift dramatically. Vacuum the surface and the tile itself taking care not to shift these out of place.
- For stubborn stains such as grease or oil drippings from a BBQ or food, we recommend any degreaser product suitable for use on decks.
- Power Washing – This is not necessary but should be considered in the event that your area is situated on ground level. It will also assist with stubborn dirt/dust that accumulates over time and may become difficult to remove from the embossed grain by only scrubbing the surface with a soapy solution.
- In order to remove ice or snow accumulation, we recommend using calcium chloride or rock salt. When applying these products to your flooring, they may leave a white residue. This can easily be removed with a soft brush and warm soapy water.
- It is recommended to keep heat sources away from WPC, as it has a tendency to retain them. This can also lead to damage in the deck tile surface.
Grass
Applicable to Verdure line
- Brush the artificial grass surface material of your tiles, using a plastic rake or hard bristled broom in order to dislodge debris and dirt. Proceed to vacuum debris up, using a soft brush attachment and gently gliding the vacuum over the surface of the grass blades.
- (Optional step)we highly recommend removing each tile one by one (only) to expose and clean any debris accumulation underneath the tile. Do this by gently grabbing onto any secure area of the artificial grass to lift the deck tile. This will ensure optimal drainage and airflow performance of your flooring. When taking this step, it is extremely important that the levelling strips positioned underneath your tiles are put back exactly as they were installed.
Tips
- Build up of organic matter underneath a deck tile, may lead to issues with fungus, mould or mildew growth, as it gets trapped and retains moisture. This could further void the warranty that comes with your purchase, if damage occurs to the tile as a result of leaving organic build-up for long periods of time. Make sure you clean your deck tiles according to the exposure of the elements and how frequently you see fit.
- Tiles should be cleaned individually instead of removing them all. This ensures the levelling material that is originally installed, is left intact and does not shift dramatically. Vacuum the surface and the tile itself taking care not to shift these out of place.
- When placing your grass inserts back down after cleaning, make sure the excess nap of one edge overlaps the receding edge of the next tile. The nap must also run in one direction in order to achieve the illusion of a continuous grass texture.
- If the grass on the proceeding tiles edge gets trapped while placing another back down, simply lift the tile at this location by a inch or so by gently grabbing the nap. This should help to release it and nestle over the next one.
- If you choose to remove your grass tiles for the purpose of cleaning, it is extremely important that the levelling strips installed underneath (if and where applicable), are put back exactly as they were found in order to avoid rocking and unevenness of the product.
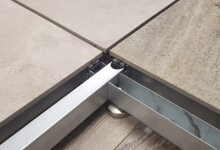
Porcets (Elevated porcelain tile)
- Remove any loose debris/dust/dirt from the surface of your porcelain pavers; by vacuuming with a soft brush attachment or sweeping it up with a soft bristle brush.
- Optional step:we highly recommend removing each porcelain paver one by one (only) to expose and clean any debris accumulation underneath the structural frame. This will ensure optimal drainage and airflow performance of your flooring. To remove the paver, insert something thin and strong in between the outer gap, such as a flat head screwdriver. Carefully and gently lift up the porcelain tile only, until you are able to grip and remove it to the side.
- Vacuum or brush off any debris accumulation on the foundation, exposed (concave) metal channels and anything clinging to the support feet.
- Place the porcelain paver back down in its designated place, making sure it sits securely upon the frame and against the fins at each edge. Failure to do so may result in a tile cracking.
- To remove dust and dirt from the porcelain paver only, proceed to wash and scrub with a brush or mop. Any (non aggressive) all-purpose cleaner, such as dish soap liquid mixed with water to create a soapy solution, is highly recommended
- The soapy solution can then be mopped up as needed with fresh water. Repeat steps 1-5 as required.
Tips
- Build up of organic matter underneath a porcelain pavers, may lead to issues with fungus, mould or mildew growth, as it gets trapped and retains moisture. It can also interfere with drainage and airflow. Make sure you clean your deck tiles according to the exposure of the elements and how frequently you see fit.
- Take extreme care when removing the porcelain paver to clean underneath. Porcelain is a brittle material and crack easily if dropped, or if pressure is applied in the wrong areas.
- Do not tamper with or adjust the feet supporting the metal frame, when cleaning underneath your flooring.
- Do not remove the plastic spacers that hook over the fins of the metal rails at each end and connect the sections to one another.